I haven't posted a craft tutorial in quite awhile, so I guess I'm overdue. This one just sort of happened and was not at all planned. Those are the crafts I think I enjoy the most, not the ones that you have to rack your brain on, trying to dream up for a blog post.
I found this drawer-thing by the curb. I immediately liked it because of the mid-century modern style, dove tail corners and two toned wood grain finish. I knew it needed me to turn it into something.
I took it to my little studio and got out my can of free paint (from the recycling center) and painted the entire inside, leaving the rest unpainted.
Nice and clean!
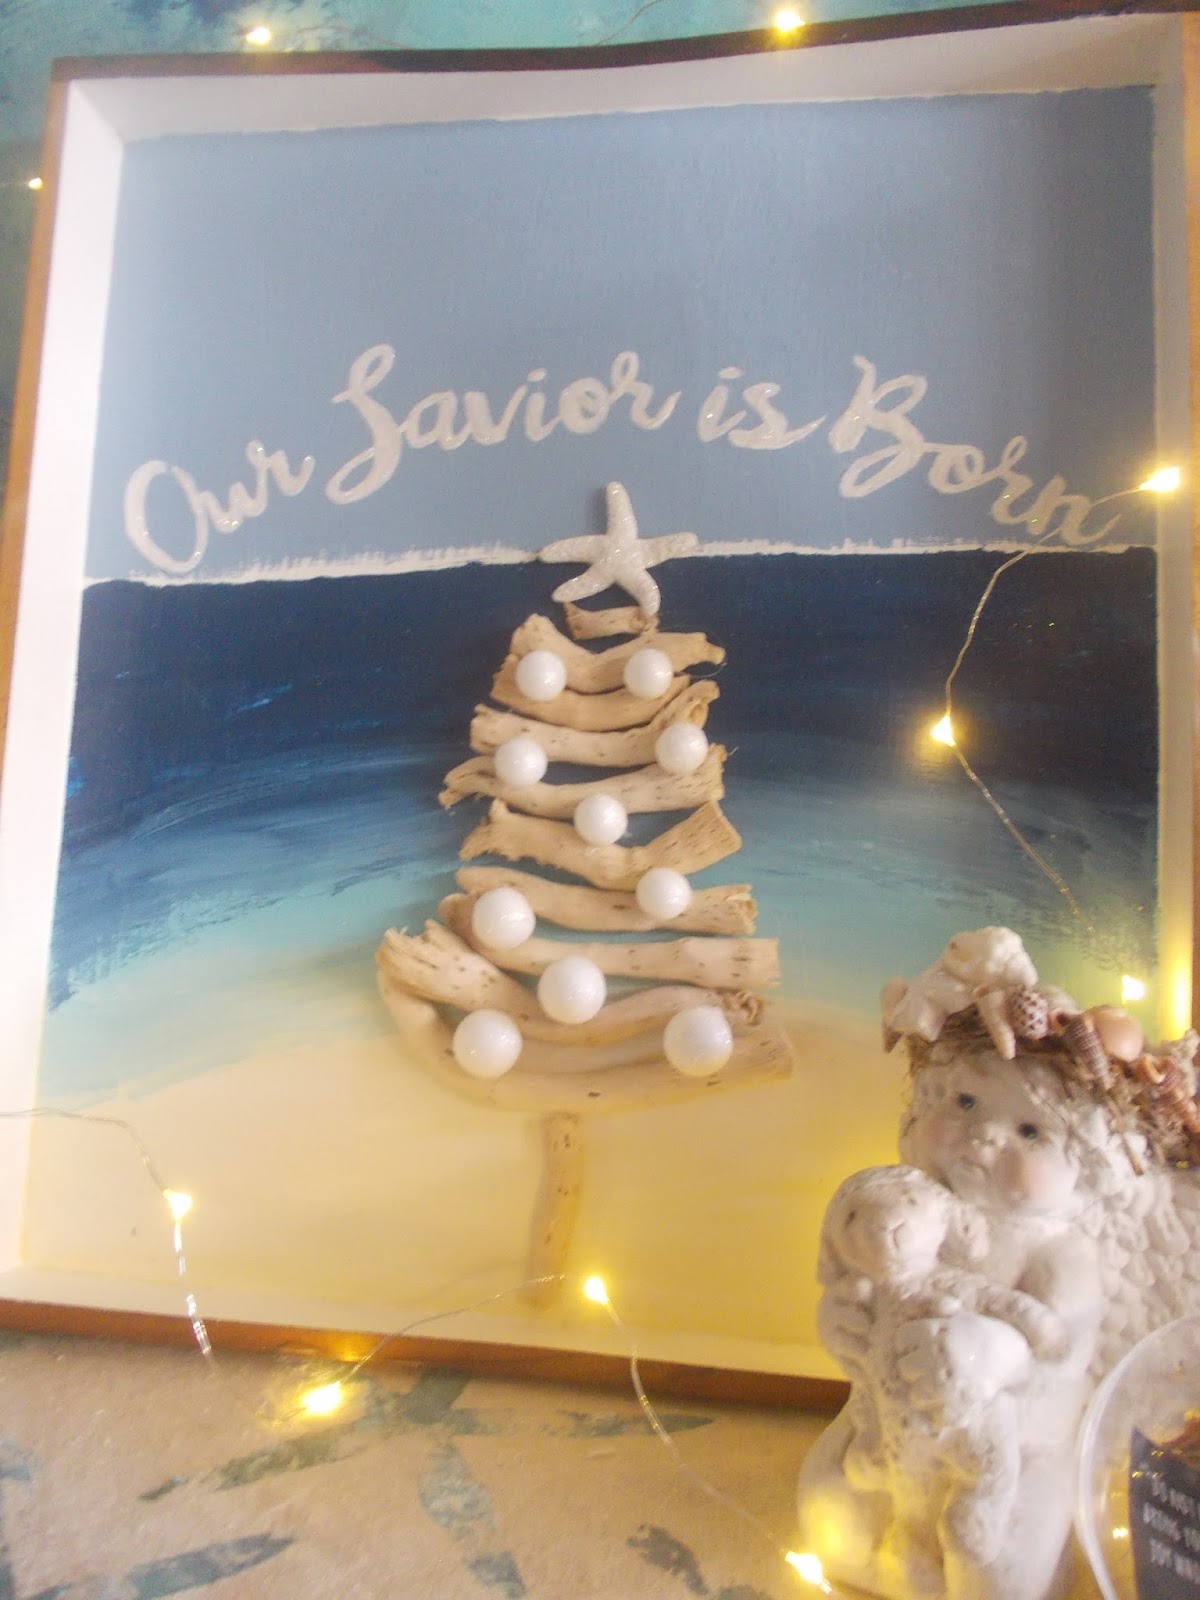
I decided to make it into a coastal Christmas sign of some sort. Most importantly, I also wanted it to reflect the true meaning of Christmas. It's easy to find coastal style Christmas decor and Christian style Christmas decor, separately. Finding them combined is a whole other story.
I first decided which Christmas saying I wanted and then went into Picmonkey and printed it out.
There are a lot of different ways to transfer lettering, but I settled for this really simple method. I used an artist's graphite pencil, although a regular pencil should do, and flipped the paper over and darkened the back of each letter.
I cut out each separate word so that I could place them where I wanted them. And I made sure there was room for everything before transferring. I secured them with painters tape as well as the inside frame. I traced over the letters using a ball point pen, pressing down firmly.
After removing the paper. I painted inside of each letter with masking fluid, to raise up the lettering. This isn't typically what masking fluid is for at all. I usually use it to mask off areas of paper that I'm painting with water colors and then peel off and discard the dried masking fluid. For this craft, I left it on permanently.
After allowing the masking fluid to dry over night, I painted a simple beach scene. I used the paint samples from my wall mural, plus a turquoise-y color I had as well. I just blended it all with a large brush.
Once the paint was dry, I went over the lettering very carefully with a white liquid chalk marker.
I tried to capture the raised lettering in this picture, you can kinda see it.
I was really happy about how it turned out and I sprinkled a little glamour dust over the wet lettering.
I wanted to add a drift wood Christmas tree topped with a starfish to my beach, The only starfish I owned that was the right size, was this poor little guy, who had already seen a few other craft projects
I glued his two broken arms back on with spackle, painted him white and sprinkled him with glamour dust. Better than new!
I laid out my drift wood pieces and star in the position I liked and then hot glued everything down.
Then I hot glued on some tiny, sparkly styro-foam balls I had and was done.
Cost of this project? $0. Enjoyment? Priceless!
This Christmas ornament was a free party favor I received a few years ago at a Christmas dinner party. Such a simple idea to add a scripture and gold glitter inside a plastic ornament, I really love it.
This little coastal Christmas angle was originally a wedding gift from 23 years ago! When it was new, it had tiny dried flowers around it's halo. After 23 years, those had since turned brown and mostly fallen off. So I took out some tiny shells and bits of coral and hot glued a new halo on.
I hope you're all having a blessed Christmas Season!