The paper in this shadow box was puckered and in need of some new lining.

This is all I used for the project: my trusty glue gun, scissors, burlap and shells.

I managed to save most of the cute picture that came with the frame, I'm not sure what I'm going to do with it. I scrapped everything off using one of my favorite tools, a butter knife.

I cut a square of burlap slightly larger than I needed and glued it to the inside surface of the box.

I trimmed to fit after it was glued. I learned that burlap is tricky and it's better to guesstimate larger than you need.
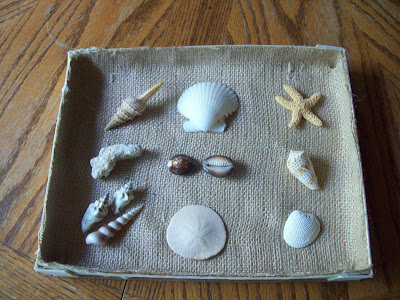
I simply arranged, then glued my shells the way I liked them.

As for the frame, I used some straw like texture, burlapy looking ribbon and simply hot glued it around the frame.

I embellished the frame with pale wooden letters and small shells.

This was pretty easy to make and was a lot of fun!


 I've been scouting around for a while, looking for a shadow box to make over. I finally found one at GW for the right price.
 The paper in this shadow box was puckered and in need of some new lining.
 This is all I used for the project: my trusty glue gun, scissors, burlap and shells.
 I managed to save most of the cute picture that came with the frame, I'm not sure what I'm going to do with it. I scrapped everything off using one of my favorite tools, a butter knife.
 I cut a square of burlap slightly larger than I needed and glued it to the inside surface of the box.
 I trimmed to fit after it was glued. I learned that burlap is tricky and it's better to guesstimate larger than you need.
 I simply arranged, then glued my shells the way I liked them.
 As for the frame, I used some straw like texture, burlapy looking ribbon and simply hot glued it around the frame.
 I embellished the frame with pale wooden letters and small shells.
 This was pretty easy to make and was a lot of fun!
 Linked to: